New Barn Album-
The dream of having a barn for my horses finally became a reality for me.
I decided to go with a portable metal barn for three reasons...
ONE- it's portable, in case we move
TWO- for the lower fire risk
and THREE- so our equine friends (aka "the beavers") wouldn't have a chew-fest on our new barn.
After pricing pre-made metal barns, being the crazy person that I am
I had the "hairbrained" idea that we should build it ourselves....
I'd been drawing up various plans for a barn for years
I felt we could build a barn with better specs than what we'd seen
with a higher snowload capacity and a stronger frame.

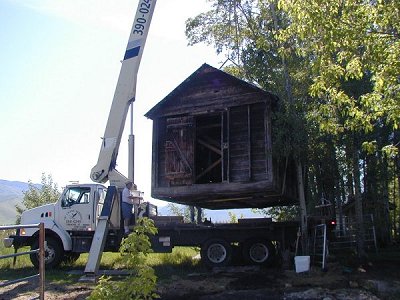
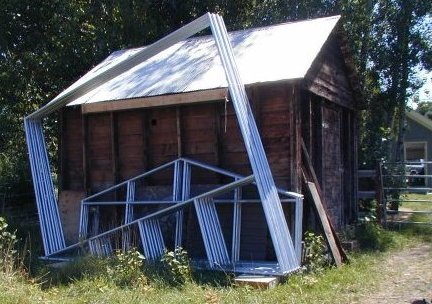
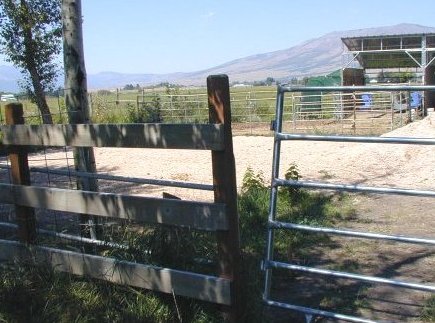
After some discussion, we agreed the best site for the new barn
was right where our old shed was located, so we hired a crane to move it.
There were a few tense moments with the shed swinging in the air...
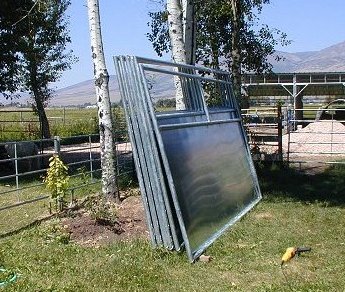
The galvanized metal pipe and sheeting that was needed
was ordered from local metal suppliers. (in April)
All the pipe was 1 5/8" OD, which came in 24' lengths.
To cut the pipe we used a drill press with a pipe notcher set up on it.
Round blades were used on the drill press for the round cuts,
and a chop saw with a metal blade was used for the 45 degree and the straight cuts.
A small wire feed flux core welder was used to weld it all together.
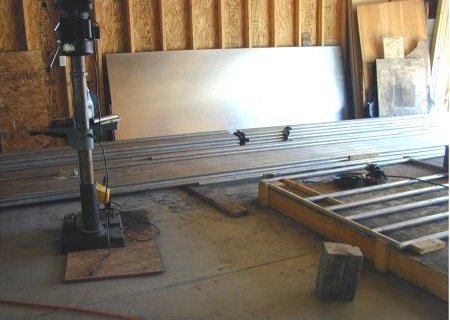
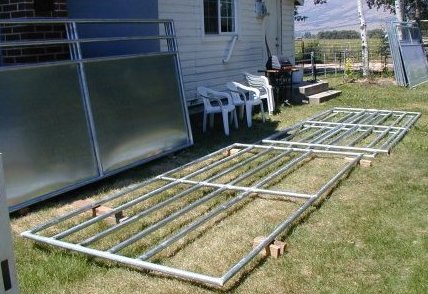
A 12' x 12' wooden platform was built out of 2 x 6's and waferboard.
It enabled us to set up a "jig" to hold the pipe in place
while being welded.
The jig helped make sure the panels turned out the exact same size,
and helped make sure all the panels turned out perfectly square.
Here is a picture of one of the stall front panels set up in the jig.
Another pic of the wooden platform, with a sidewall panel in a jig, and my Lincoln welder.

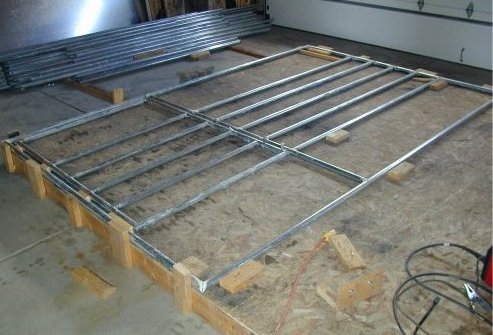
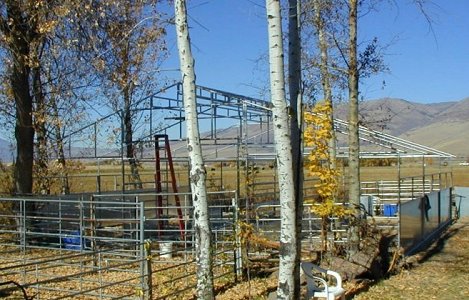
The frames and the breezeway trusses were built first.
They were made out of heavier 13 gauge pipe
since they hold the bulk of the weight of the barn.
They were stored next to our old shed until they could be put up.
The frames are upside down in this picture.
Next came the backwalls. The pipe for the panels was a 15 gauge.
The galvanized sheeting on the wall panels was 14 gauge.
It had to be strong enough so the horses couldn't kick through it.
The 4 foot solid wall panels turned out to be the heaviest ones.
We then made the sidewall panels. The outside panels had 4 foot solid metal siding.
The inside panels had 2 foot high metal so the mini horses would
still be able see each other, and socialize.
The last parts of the barn that were made were the trusses/purlins (not pictured)... 42 of them.
There were so many welds on them I borrowed a second welder to finish them faster.
We both cut all the pipe for this project,
and my husband sanded and painted the welds
which was incredibly BACKBREAKING hard work!
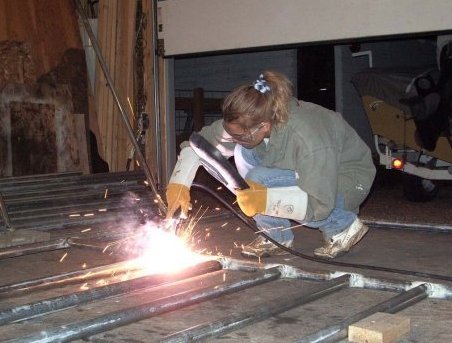
My task was welding....
I'd been wanting to get a welder and learn to weld.
I realize it's not considered "lady like",
but hey they don't exactly teach manure shoveling in Charm School either. ;)
I'd only welded a few times before we started building the barn, but I got really good at it.
You have to be careful welding galvanized metal because it gives off toxic fumes.
The welding was done in a well ventilated area,
and I always had a fan running to increase the air flow.
I also wore a respirator, but I looked like an alien with it on, so I took it off for this pic.
There are a LOT of sparks when you weld.
Fortunately I managed not to light myself or anything else on fire. ;)
We had to bring in a few loads of roadbase to prepare the site.
Leveling the pad, putting down railroad ties for under the frames, and getting holes dug
for the cement anchors turned out to be a HUGE "pain-in-the-backside" of a job.
Much more work than either of us expected it to be...
FINALLY!!!
SIX MONTHS AFTER WE STARTED THIS PROJECT...
WE GOT TO START ASSEMBLING IT!!!
(did I mention this was a hairbrained idea???)
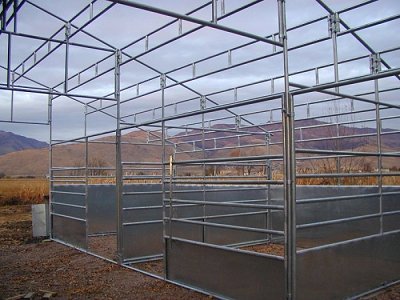
Here is a closer look at the frames and how everything clamps together....
There are five roof trusses/purlins per 12 x 12 stall,
this made the roof much stronger than anything pre-made we'd seen.
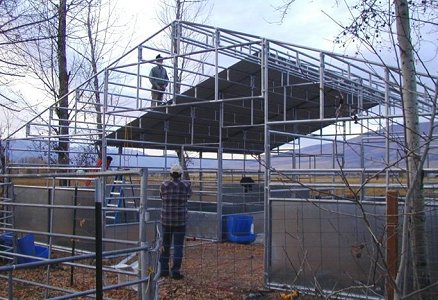
Starting on the roofing...just in time for winter. (November)
The roof was made with a 4/12 pitch so the roof could shed snow more easily.
We went with a stronger 26 gauge metal roofing which also slightly increases the amount of snow
the roof can hold (snowload) and the roofs ability to hold up to the wind.
For our area, roofs are required to be able to hold a 40 pound snowload...
our roof with all the trusses and heavy duty roofing will hold closer to 90 pounds.
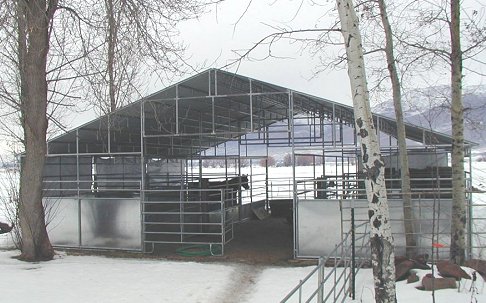
The barn walls and roof are all up, but we weren't able
to get the siding up before the first snow hit.
The barn is usable now for the horses,
but we had to put up temporary tarps to keep the snow out 'til spring.
More to come....